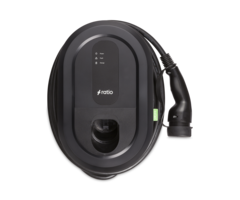
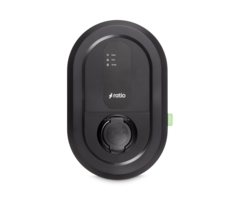
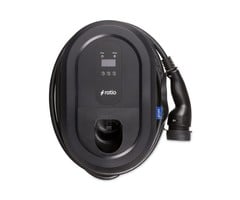
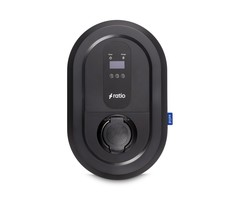
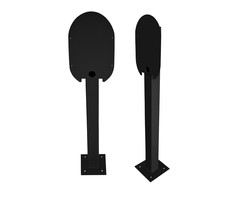
Ratio EV charger
Ratio EV Chargers - Why a good choice?
Ratio Electric is a hugely experienced company within the electric solutions industry. Since 1960, the company has been spreading its ‘power solutions’ throughout Europe and even beyond. So, after many innovations, Ratio charging stations have been added to that for a few years now. The most recent Ratio EV Chargers are equipped with the most modern features, making a Ratio wallbox definitely a EV Charger to consider.
All quality products are manufactured from Nijkerk, the Netherlands.
- 5-year warranty with excellent service
- Smart EV Chargers
- Made in Holland
Popular Ratio EV Charger models
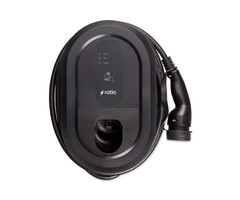
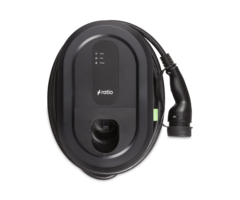
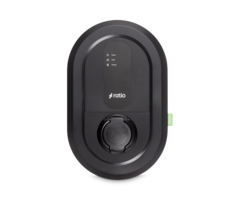
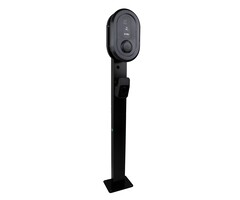
We sell three different Ratio EV Chargers within our product range. These EV Chargers look similar from the outside, but differ considerably in terms of features.
All Ratio EV Chargers are available as socket or cable models.
The individual qualities of each model will be discussed in more detail below.
Ratio Solar
The Ratio Solar is Ratio Electric's most comprehensive charger. Although the EV Charger does not have a display, it has almost every feature a smart EV Charger needs. The Ratio Solar is perfect for use with its own solar panels .In fact, it can be supplied with sensor box and 3 CT terminals. This is an optional feature. These clamps are necessary to measure power consumption in your household, use dynamic load balancing and make optimal use of your solar panels. All of the above can be easily monitored in the Ratio EV App.
Read more about Ratio Solar here
Ratio Solid
In terms of functions, the Ratio Solid is almost as comprehensive as the Ratio Solar. Whereas the Solar lacks the display, it is present here. The Solid only does not have the link to the Ratio EV app. This means that it is not possible to see your power consumption via the app. Through the display on the Ratio EV Charger, however, it is possible to chart your charging history. Like the Ratio Solar, the Ratio Solid comes with a 5-year warranty and the option the rest of the smart features.
Read more information about the Ratio Solid here
Ratio io6
Finally, the Ratio io6. This EV Charger from Ratio is mainly intended for the business customer.
The io6 does not have a display, but like the solar, it can be controlled with the Ratio EV app. The EV Charger has the option of business settlement with E-flux. The E-flux back office automatically ensures that the costs are settled on a business basis.
Dynamic Load Balancing and connection to solar panels are optional with the io6. To access this, you need the Sense 3-phase kit 63A. This consists of 1 sensor box and 3 CT terminals.
Read more about the Ratio io6 here
Installation of a Ratio EV Charger
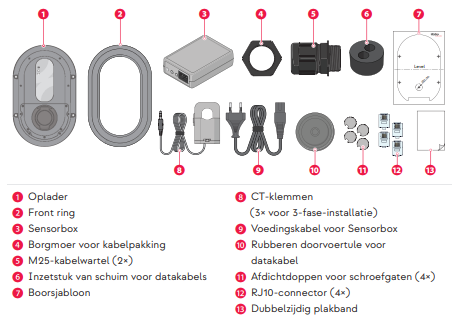
To give the best possible picture of the installation of a Ratio EV Charger, we cover the installation of the Ratio Solar below. According to the Ratio manual, the installation of the Ratio Solar consists of 6 steps. This EV Charger has the following contents:
Connect power cable in meter box
Switch off the circuit breaker. Then lay the power and data cable between the meter box and the site of the EV Charger installation. Installing an Ethernet cable is also hugely recommended. Then install the RCD, strip the wires of the power cable and then connect it to the RCD in the meter box.
Installing sensor box in meter box
To install the sensor box, there should be enough space free in the meter box. If this is the case, you can mount the sensor box and connect the power cable. Connect the other end of the mains cable to a socket connected to the same phase as L1 of the charger. Then check which phase of the mains is connected to the socket.
Then place a CT clamp around the same phase wire, between the socket and the main fuse. Then insert the 3.5mm plug into the input of the sensor box.
Once you have done this, you can place the remaining CT clamps around the other phase wires. Insert the 3.5mm plugs into inputs L2 and L3.
Next, strip the wires from the data cable and insert four wires into the RJ10 connector.
Secure the wires to the connector with RJ10 crimping tools. Afterwards, note the colours and order of the inserted data cable. Finally, insert the RJ10 connector into the sensor box.
Connecting power cable to charger
Remove the five screws from the lid with a TX15 screwdriver. You can then push the lid aside to reveal the inside. Then carefully remove the left cable inlet with a screwdriver and a hammer.
Then remove the sealing nut of cable gasket, insert this cable gasket through the left cable inlet. You can then secure the cable gasket with a locking nut. Then guide the power cable through the sealing nut and cable gasket and strip the wires of the power cable. Connect the wires as follows:
Earth: green/yellow
N: blue
L1: brown
L2: black
L3: grey
Attach the wires to the connectors. Then carefully pull the excess piece of power cable out of the charger and fix it by tightening the lock nut on the cable gasket.
Connecting data cable in charger
First carefully remove the cover of the middle cable inlet. To do this, use a screwdriver and a hammer. Then poke a hole in the centre of the rubber grommet with the screwdriver. Insert the grommet into the middle cable entry. Guide the data cable through the cable gland with the grommet.
Strip the wires from the data cable. Take the four fully coloured wires and remove the unused wires. Insert the wires into the RJ10 connector, keeping the same order as for the sensor box. Then attach the wires to the connector and insert it into the left RJ10 socket of the charger. Finally, carefully pull the remaining piece of data cable out of the charger.
Checking installation
Check carefully that everything is correctly connected, firmly attached and that the CT terminals are plugged into the correct phase inputs. It is also important that the enclosure is properly secured.
Complete installation
Place the cover back on the enclosure and retighten the 5 screws. Then click the front ring onto the enclosure. Then cover the screw holes with the four sealing caps so that the mounting screws are covered. After that, you have completed the installation.
Frequently asked questions
How do I reset the Ratio EV Charger?
To reset your Ratio EV Charger, you can temporarily switch off the earth leakage circuit breaker. When it has been off for 10 minutes, you can switch it on again. The Ratio EV Charger should then restart.
How does the Smart solar function work on the Ratio EV Charger?
Ratio's Smart Solar function ensures that charging can only be done on solar energy. When there is no more sun during charging, and less than 6A can be charged, the charge post switches to normal mains power.
That's why you should buy a Ratio EV Charger
At Wallbox Discounter, we offer EV Chargers of the highest quality, backed by the best service. With these core values, we fit well with the Ratio brand. With A-quality EV Chargers for both consumers and business customers, a EV Charger from Ratio is definitely a good choice. Easily order your Ratio EV Charger now at Wallbox Discounter.


